

Visual Studio Code Tutorial: Remote Development through SSH
In this tutorial, you'll learn how to set up and use the SSH remote development extension for Visual Studio Code. With this extension, you can easily open and manipulate folders on a remote computer using the power of vs code on your local machine.


Prerequisites
- Visual Studio code installed on your machine.
- Remote SSH access to a Linux virtual machine.
What is Remote Development?
It's simple really...through the power of SSH and Visual Studio Code, you can do your website and app development on a remote computer located anywhere in the world.
Why Remote Development?
It's not for everyone but there are some great reasons to take advantage of this feature of VS Code:
- Develop on more powerful hardware
- Develop in the environment you are targeting (Windows developer? Now you can develop in Linux)
- Keep your local machine clean while experimenting with extensions, packages and such
- Centralize your code into one location
Step 1 - Install the Remote SSH Extension
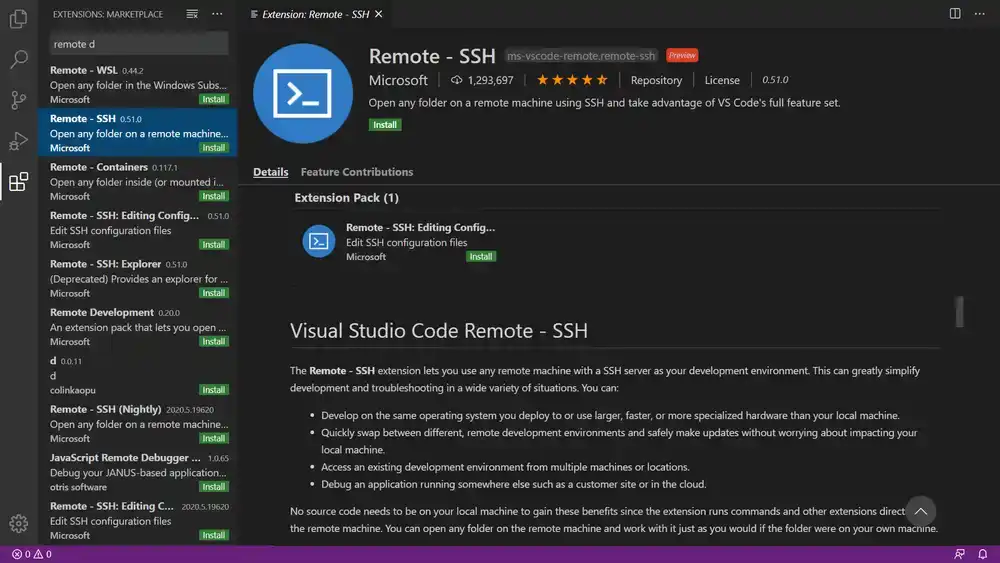
From your local computer on the left side of VS Code, click the icon for the extension marketplace. Search for the remote ssh extension and install it.
Step 2 - Add a Remote Connection
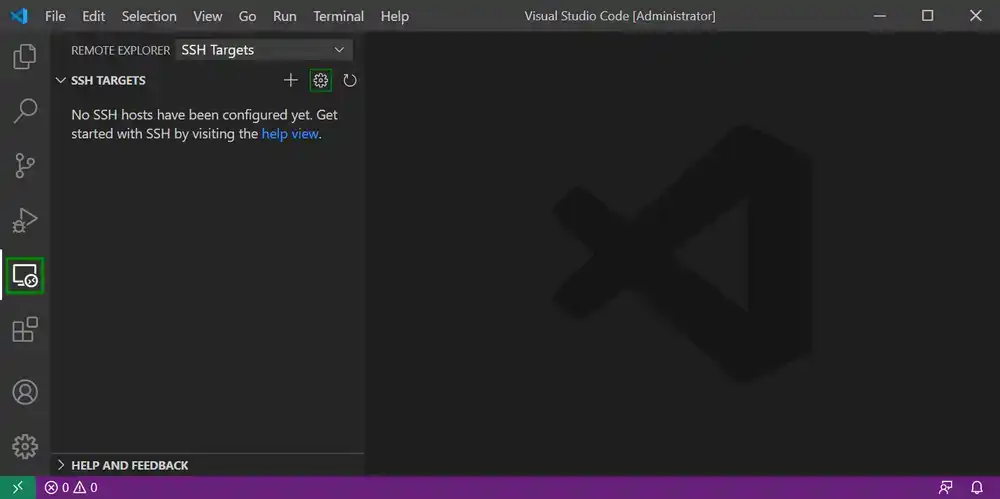
Now that the remote SSH extension is installed, you should see a new icon on the left of Visual Studio Code for the "Remote Explorer". Click on it now.
Hover over the remote explorer panel and you will see 3 icons appear for 'Add new', 'Configure', and 'Refresh'. Click the 'Configure' button:
A dropdown menu will appear asking you what config file to edit. It is best practice to edit a user-based config file instead of a system-wide file. Select the first option now.
An empty config file will come up that looks something like this:
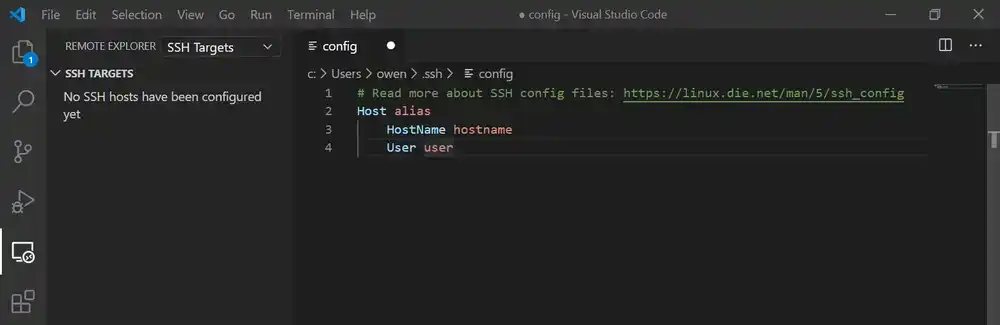
Note: The config file is mostly a list of servers you give Visual Studio Code to connect to. This file is just a standard ssh file and is not specific to VS Code. Learn more options here: https://linux.die.net/man/5/ssh_config
Now add your remote servers ssh connection details using this format:
Host <YOUR_HOSTNAME> # Can be any name to make it easier to differentiate between servers
    HostName <YOUR_SERVER_IP> # IP or URL
    User <YOUR_SERVER_USERNAME> # Username used to login to server
    IdentityFile ~/.ssh/id_rsa # Location of ssh private key (optional)
If you use an SSH key pair instead of a password to log in to your server, use the IdentityFile parameter to point to the location of your private key.
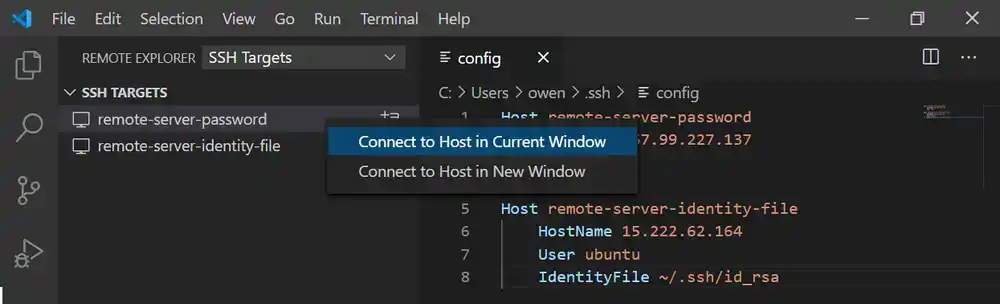
Once you add the details and save the file you'll see your server appear on the left under ssh targets:
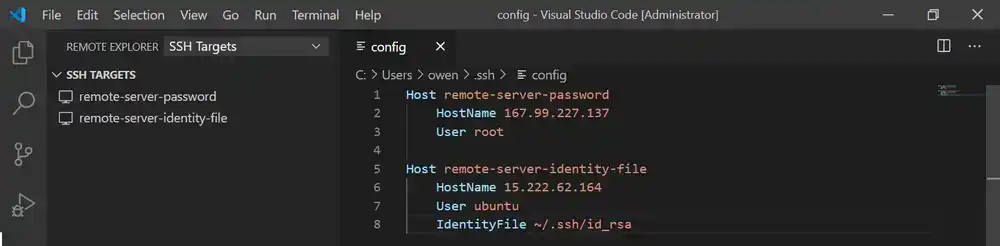
Note: I've added two hosts to my config file but you can add as many as you'd like and they will all appear under ssh targets.
Step 3 - Make the Connection
Right-click the server you added under ssh targets and select 'Connect to host in Current Window' (or new window if you prefer).
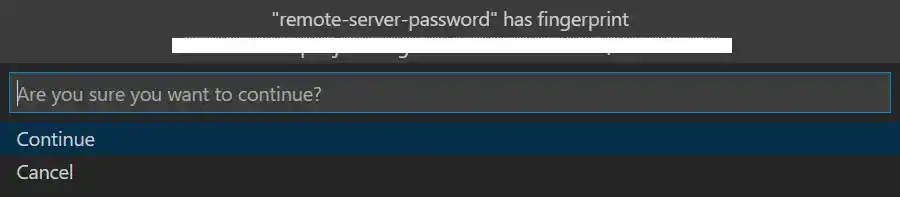
A new window will open and a connection attempt will be made. If VS Code doesn't detect the remote server's operating system, a dropdown will appear where you can select it (most people will be using Linux as their remote SSH server).

Select "Continue" if the server's fingerprint looks alright:
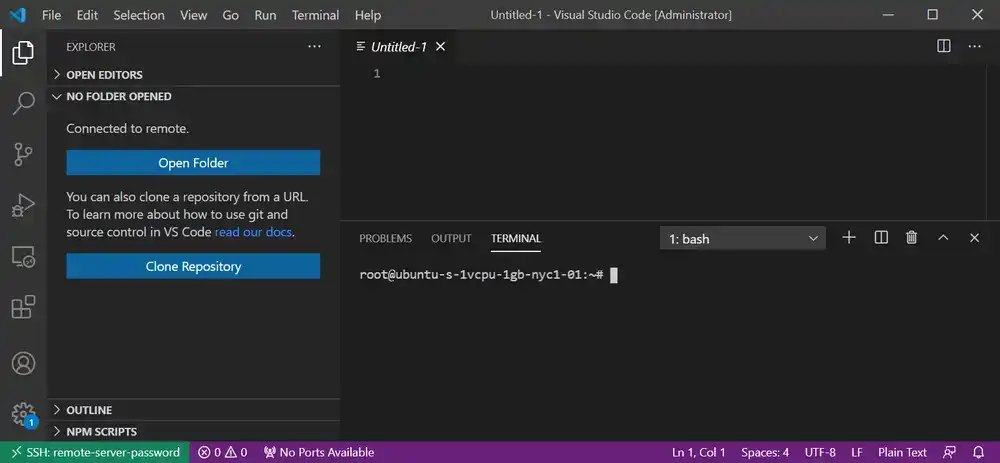
Enter the user's password for the server:

Note: You won't see this if you are using IdentityFile as your login method
You are now connected! All you need to do now is open a folder to do your development from:
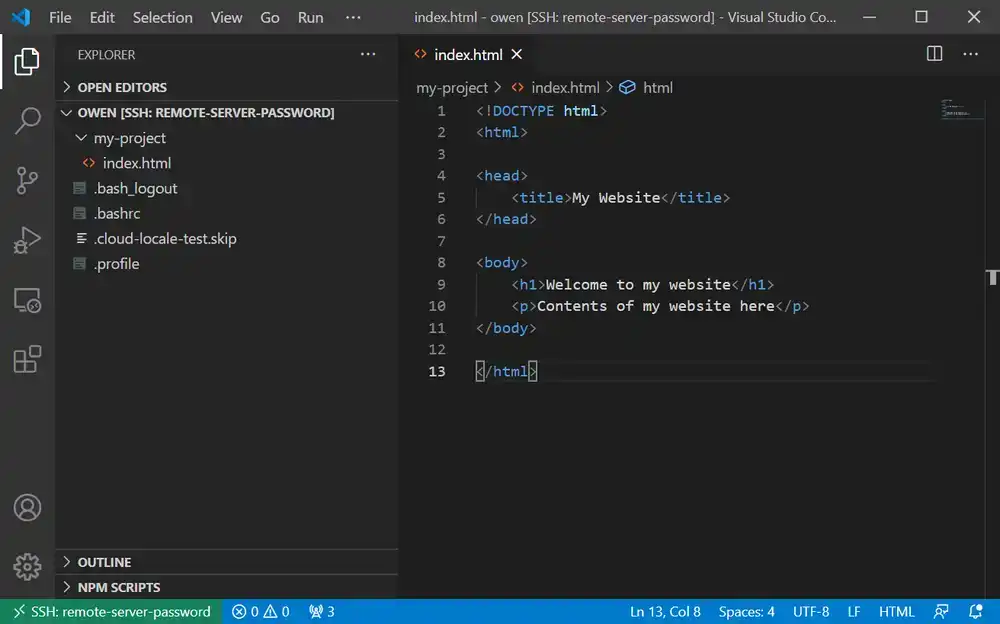
You are ready to start coding! Here you can see I created a folder on the remote computer called "my-project" and created an index.html file in that folder:
Conclusion
If this all seems confusing, it doesn't need to be. Through the power of Visual Studio Code and SSH, you are connecting to a remote machine where you can use the features of VS Code to manipulate the files, directories, and such on the remote machine as if you were developing locally. Happy coding!
Tools
Crypto Alerts
© Cloud Giant 2024. All rights reserved